想要體驗 Google 最新推出的文生圖模型 Nano Banana(Gemini 2.5 Flash Image),絕大多數人通常會透過 Google AI Studio 或 Gemini 網頁介面來使用,但現在由網友 prompt_case 開發推出了「Nano Banana Infinite Canvas」這款免費線上工具。該工具架設在 Google AI Studio 平台上,透過 API 調用,不但完整繼承了 Gemini 2.5 Flash Image 的所有功能,更採用畫布(Canvas)設計,讓原本難以用文字精準描述的圖片編輯任務,例如指定人物姿勢、替換物件、修改背景或調整構圖,得以透過直接繪圖的方式在視覺化環境中操作,實現更直覺、更精確的創作控制。這讓不擅長撰寫複雜提示詞的一般用戶,也能輕鬆駕馭專業級的 AI 圖像生成技術。需要注意的是,由於工具依賴 Google AI Studio,可能會有使用額度限制。
Nano Banana Infinite Canvas 功能
四大創作工具讓你想到就能做到
這個工具提供了四種主要功能,每個都有不同的用途:
- Add Note(添加文字備註):在畫布上直接寫下你想要的效果提示詞,像是「把天空變成夕陽色彩」或「為角色添加笑容」
- Add Arrow(添加指示箭頭):用醒目的紅色箭頭精確指向要修改的區域,讓 AI 知道重點在哪裡
- Add Drawing(添加手繪圖案):直接用滑鼠在畫布上畫草圖,可以調整筆刷粗細和顏色
- Add Images(添加圖片素材):上傳你的照片或參考圖片,支援一次選擇多張檔案
最新 V2.3 版本升級重點
- 雙圖生成模式:每次生成都會產出兩張不同風格的圖片供你選擇
- 進階繪圖功能:筆刷工具更豐富,支援多種顏色和粗細設定
- 快速下載機制:右鍵點擊任何圖片就能立即下載到電腦
- 視覺優化設計:箭頭改為紅色顯示,操作指示更加清楚
Nano Banana Infinite Canvas 使用教學與示範
第一步:快速進入工作環境
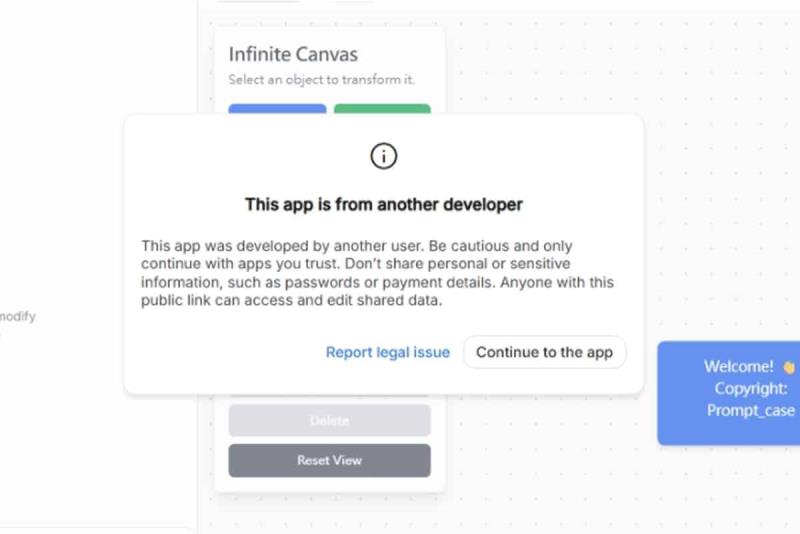
開啟瀏覽器前往工具網址,如果遇到安全提示畫面,點擊 X 關閉即可。接著會看到「This app is from another developer」的訊息,選擇「Continue to the app」繼續進入。

第二步:熟悉操作介面
進入後左側是程式碼區域(新手可以忽略),主要工作區域在右邊的白色畫布。如果左側視窗太大影響操作,可以拖拉分隔線調整大小,讓畫布區域更寬敞。

示範一:用畫作來生成圖片
1.透過 Add Note(新增註解)、Add Arrow(新增箭頭)、Add Drawing(新增繪圖)和 Add Images(新增圖片)這四項工具,就可以用畫作來生成圖片。點擊「Add Drawing(新增繪圖)」後,畫布就會出現一個 Double-click to draw,滑鼠雙擊該畫板就會正式進入。

2.可選擇筆的粗細、顏色,畫好之後,按右下角的「Save Drawing」按鈕。

3.回到畫布後,圈選這張圖,點擊右下角的「Generate」 生成按鈕。

4.稍微等候 Nano Banana 就會根據剛剛的繪圖,生成出新的圖片,每次都會生成二張,可下載也可以繼續編輯。

示範二:替換造型、髮型
1.點擊「Add Image(s)」來上傳圖片,可以一次選擇多張。

2.再來點擊「Add Note」添加備註在畫布上,並輸入修改的提示詞,例如以下:
Take the person in [Photo of a person]. Please make two subtle changes. First, change her hair color to a light pink. Second, add a pair of modern, black-rimmed glasses to her face. Ensure the changes look natural, with correct lighting, shadows, and reflections. Do not alter her facial features or expression.

3.將這二個物件都圈選起來,然後「Generate」 按鈕生成的圖片。

示範三:單純提示詞生成圖片。
1.點擊「Add Note」後輸入提示詞。
A photorealistic close-up portrait of an elderly Japanese ceramicist with deep, sun-etched wrinkles and a warm, knowing smile. He is carefully inspecting a freshly glazed tea bowl. The setting is his rustic, sun-drenched workshop. The scene is illuminated by soft, golden hour light streaming through a window, highlighting the fine texture of the clay.Captured with an 85mm portrait lens, resulting in a soft, blurred background (bokeh). The overall mood is serene and masterful. Vertical portrait orientation.

2.生成的圖片。

示範四:指定模特兒動作
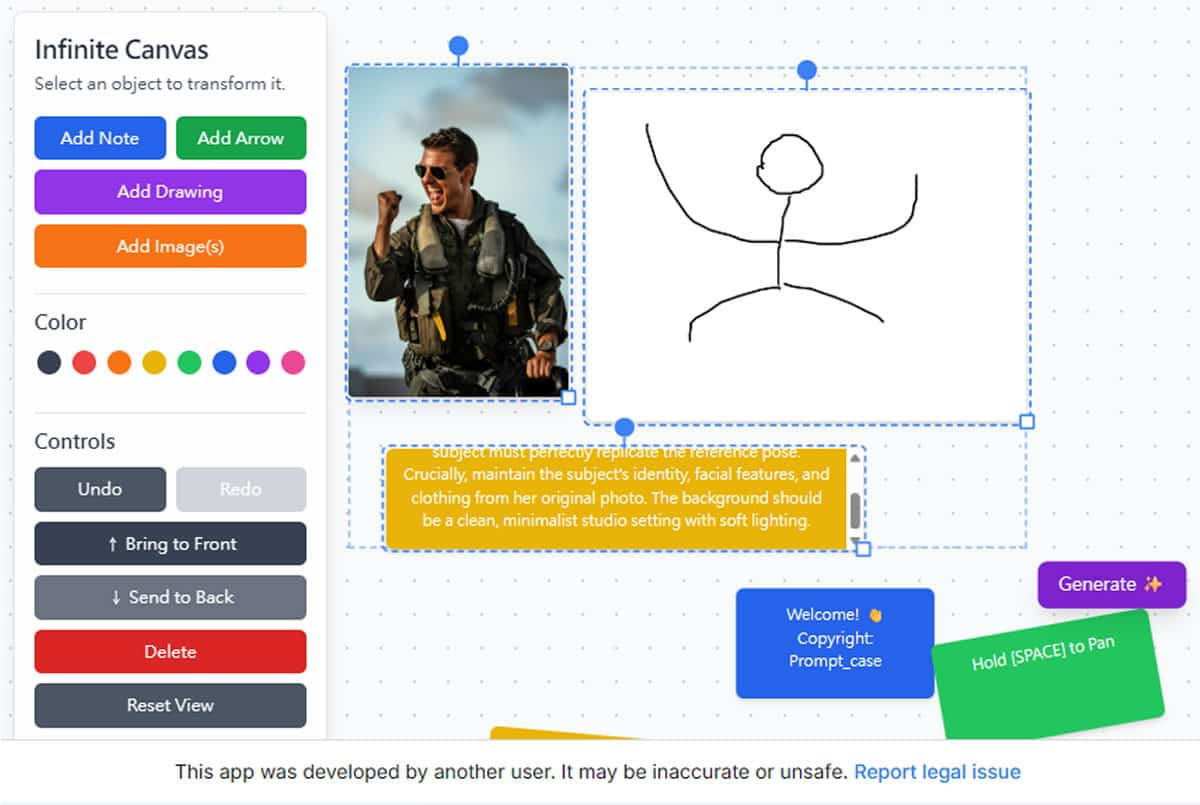
1.上傳圖片後再點擊「Add Drawing(新增繪圖)」劃出指定動作,如下圖:

2.再來點擊「Add Note」添加備註在畫布上,並輸入以下提示詞:
A photorealistic close-up portrait of an elderly Japanese ceramicist with deep, sun-etched wrinkles and a warm, knowing smile. He is carefully inspecting a freshly glazed tea bowl. The setting is his rustic, sun-drenched workshop. The scene is illuminated by soft, golden hour light streaming through a window, highlighting the fine texture of the clay.Captured with an 85mm portrait lens, resulting in a soft, blurred background (bokeh). The overall mood is serene and masterful. Vertical portrait orientation.

3.將畫板上的兩個物件使用滑鼠圈選後,然後「Generate」 按鈕生成的圖片。

示範五:AR 眼鏡與圖片標示功能
1.上傳圖片後再點擊「Add Note」添加備註在畫布上,並輸入以下提示詞:
Analyze the provided [Scene Image]. Identify the 1-3 most prominent landmarks, buildings, or points of interest. For each identified point, draw a neat, glowing blue outline around its silhouette. Next to each outline, overlay a clean, semi-transparent dark UI box. Inside each box, display plausible information such as a generated Name, Type/Location, and a brief, one-sentence description. The overall style should be modern and informative, like an augmented reality (AR) view.

2.將畫板上的兩個物件使用滑鼠圈選後,然後「Generate」 按鈕生成的圖片。

綜合上述,我們可以看出 Nano Banana Infinite Canvas 完全繼承了 Gemini 2.5 Flash Image 的功能特點,且進一步將這些功能的操作步驟更加便利化,方便使用者更友善的操作,如果還在使用或使只有使用過 Google AI Studio 或 Gemini 來體驗 Nano Banana,那麼,不妨也來試試 Nano Banana Infinite Canvas。